While recently working on a project to migrate an on-premise Hyperion Planning application to Oracle Planning and Budgeting Cloud Service (PBCS) I ran into a requirement to export data from the application to a downstream data warehouse. On premise this is handled with a BSO export calculation script. One of the changes we implemented when moving the app to the cloud was to take advantage of the ASO reporting cube plan type to eliminate the need to run aggregations on the BSO plan type. This decision however caused a challenge for exporting the data.
When evaluating options we recognized that while we could use a business rule to export the data from the BSO plan type, not all the data we needed was available since we were not aggregating the BSO cube. In light of this we decided we would extract the data from the ASO reporting cube. The challenge with this approach however was that we could no longer use the business rule export since it is not supported for ASO plan type, furthermore the default export feature of PBCS was both slow and resulted in an output format the downstream system was not happy with.
Considering our options I came to look at Data Management (DM). For those of you not familiar with DM it is basically a simplified version of Financial Data Quality Management (FDMEE) that is included with PBCS. DM does provide a mechanism for exporting data from a PBCS plan type to a text file. While this process is documented relatively well, for BSO plan types, by Oracle and on other blogs, there are some unique steps required when pulling from an ASO plan type that are not covered well in the resources I looked at.
In this tutorial I am going to walk through the steps necessary to export ASO reporting cube data into a delimited text file.
Let's start by logging into PBCS and opening the data management workbench from Navigator.
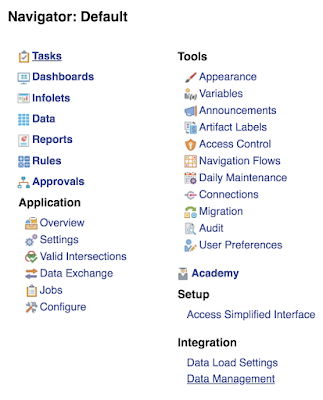 |
| Fig. 1 |
[Sidebar: Oracle is in the process of updating the DM interface in PBCS. Some of the steps I am going to discuss can be accomplished in the new interface, however some important ones cannot. For that reason and to reduce confusion I am going to base this tutorial on the existing legacy interface. Perhaps at some future date when all steps can be completed in the new interface I will update this post with new screenshots.]
The first thing we are going to do is go to the Setup tab and register a Target application.
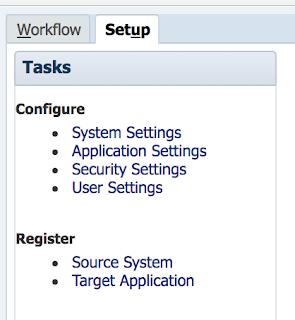 |
| Fig. 2 |
You will note there is a Source System option and it would be logical for you to assume that we would need to set up a source for our target. In this case however we are not going to register a source, instead we are going to register two target applications, one for the text file export and the other for the ASO plan type, I know that may seem a bit counterintuitive, but it's the way it has been designed and why we are having this tutorial.
Let's start with adding a target application for the text file we are going to output.
Below Target Application Summary, click the Add button.
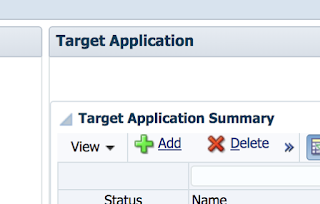 |
| Fig. 3 |
Then choose Local
 |
| Fig. 4 |
Select 'Custom Application' for the Type
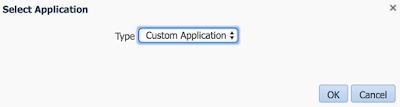 |
| Fig. 5 |
Then give the application a name
 |
| Fig.6 |
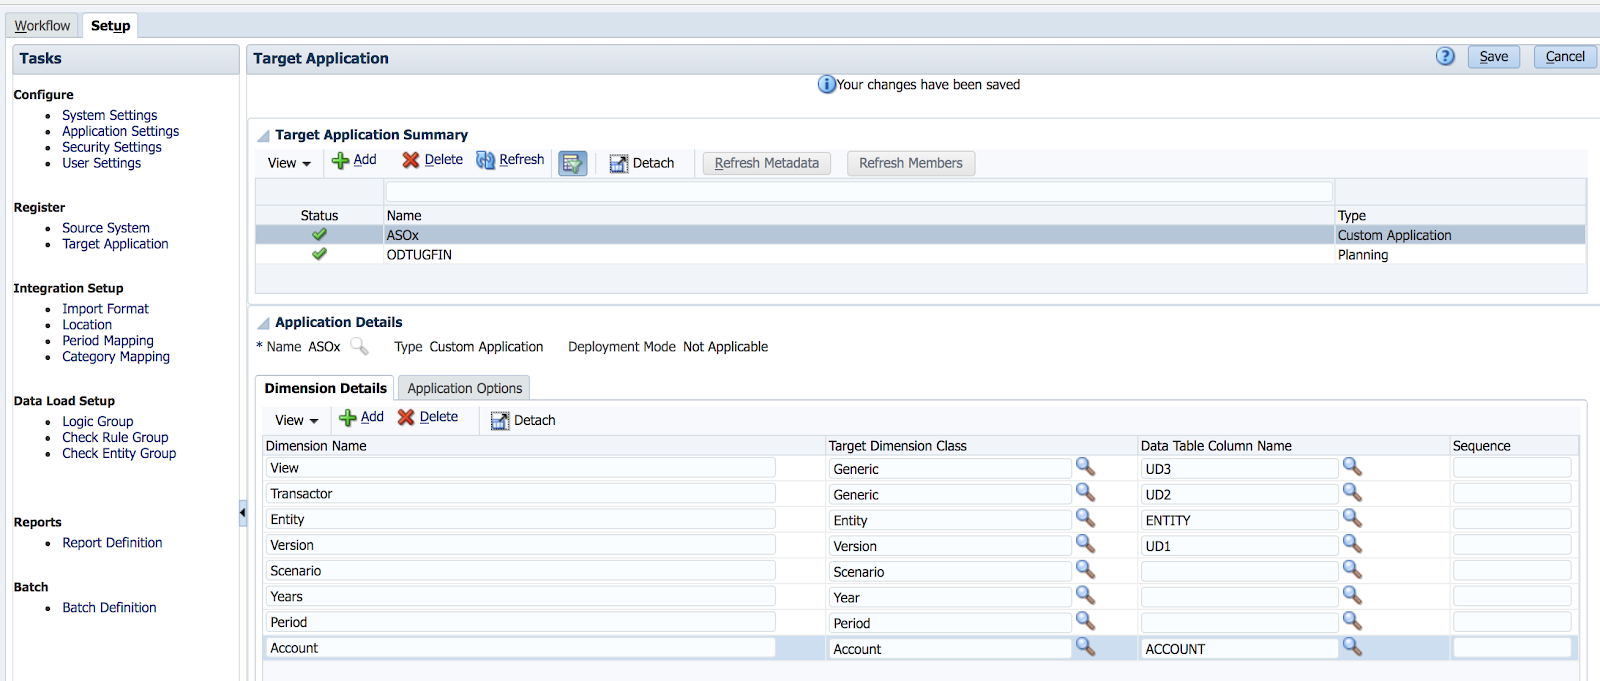
The next step is to go to the Application Details and add dimensions to the Dimension Details tab. You will need to add the dimensions from your PBCS application that you want to include in the export file. Take care to properly define the Target Dimension Class and the Data Table Column Name.
 |
| Fig. 7 |
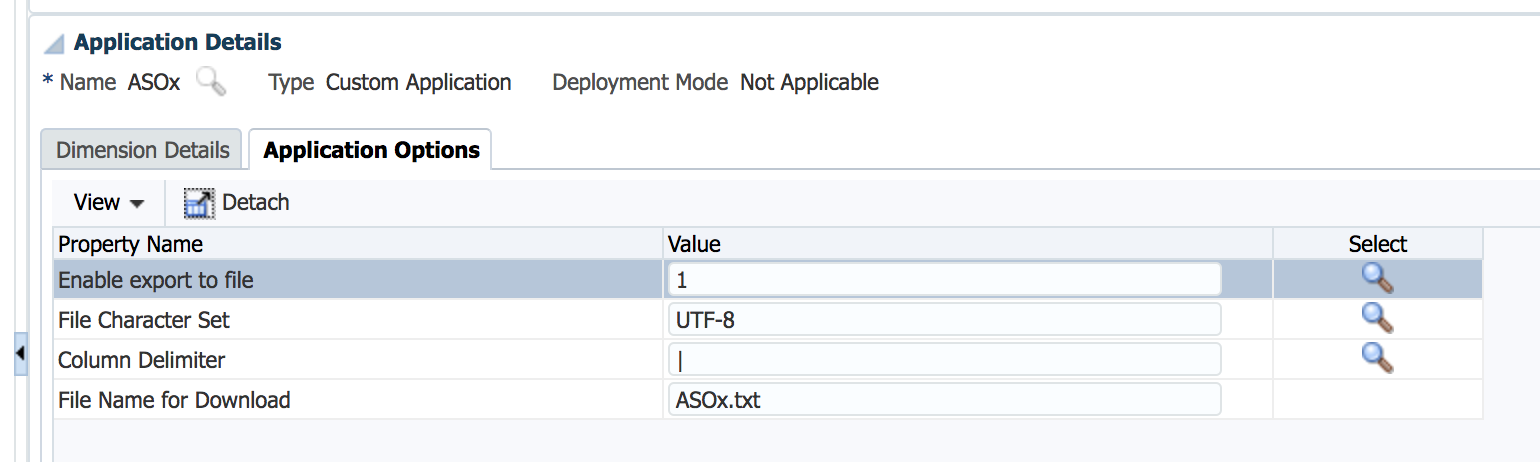
After you add your dimensions, be sure to hit save and then go to the Application Options tab. Select your column delimiter and enter a name for your output file. Be sure to hit save when you are done.
 |
| Fig. 8 |
Congratulations, you've completed setting up the output file application, now let's set up the ASO plan type target application. Go back up to Target Application Summary and hit the Add button.
 |
| Fig. 9 |
Again, select Local
|
| Fig. 10 |
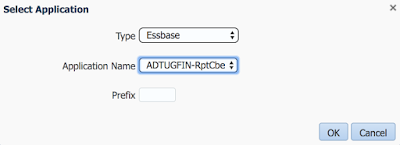
This time we are going to select 'Essbase' and select our reporting cube from the drop down list. Note that if you have more than one ASO plan type you will see them listed here and need to select the one you want to export from. Once you have selected the correct values, click OK
 |
| Fig. 11 |
[Sidebar: Now you might be wondering why we selected Essbase instead of Planning for the application type. If you select Planning you will wind up working with the BSO plan types. This is well documented in other blogs. Because we want to use the ASO plan type, we need to select Essbase. I assume this is because behind the scenes the ASO plan type is in a separate Essbase application. While a BSO Essbase application allows multiple databases in a single application, ASO does not. Therefore, even though Oracle wraps PBCS around it to make it easy for customers, the underlying architecture is an individual Essbase application and much like the cheese, it stands alone; therefore we need to select Essbase as the application type.]
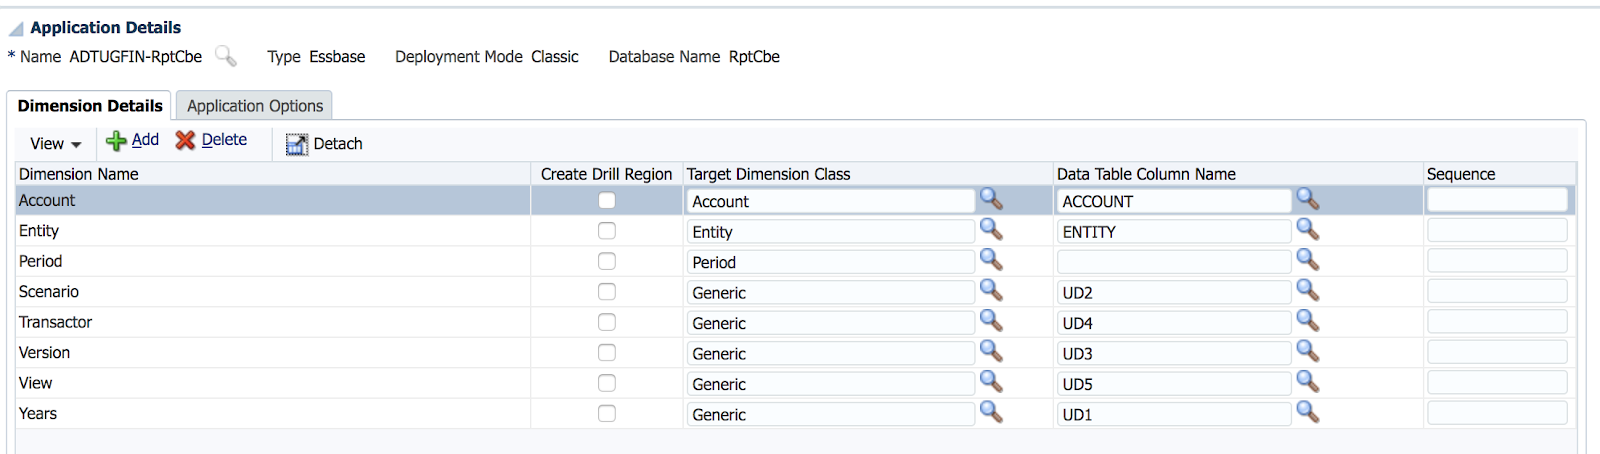
You'll see that your Dimension Details are automatically imported from the ASO outline. Take care to note that the Target Dimension Class and the Data Column Name values are set properly. You will see that they do not exactly match the target application we created earlier for the text file export. Unlike in the first target application Years and Scenario are generic classes with user defined data columns.
 |
| Fig. 12 |
Save your target application and then refresh members.
 |
| Fig. 13 |
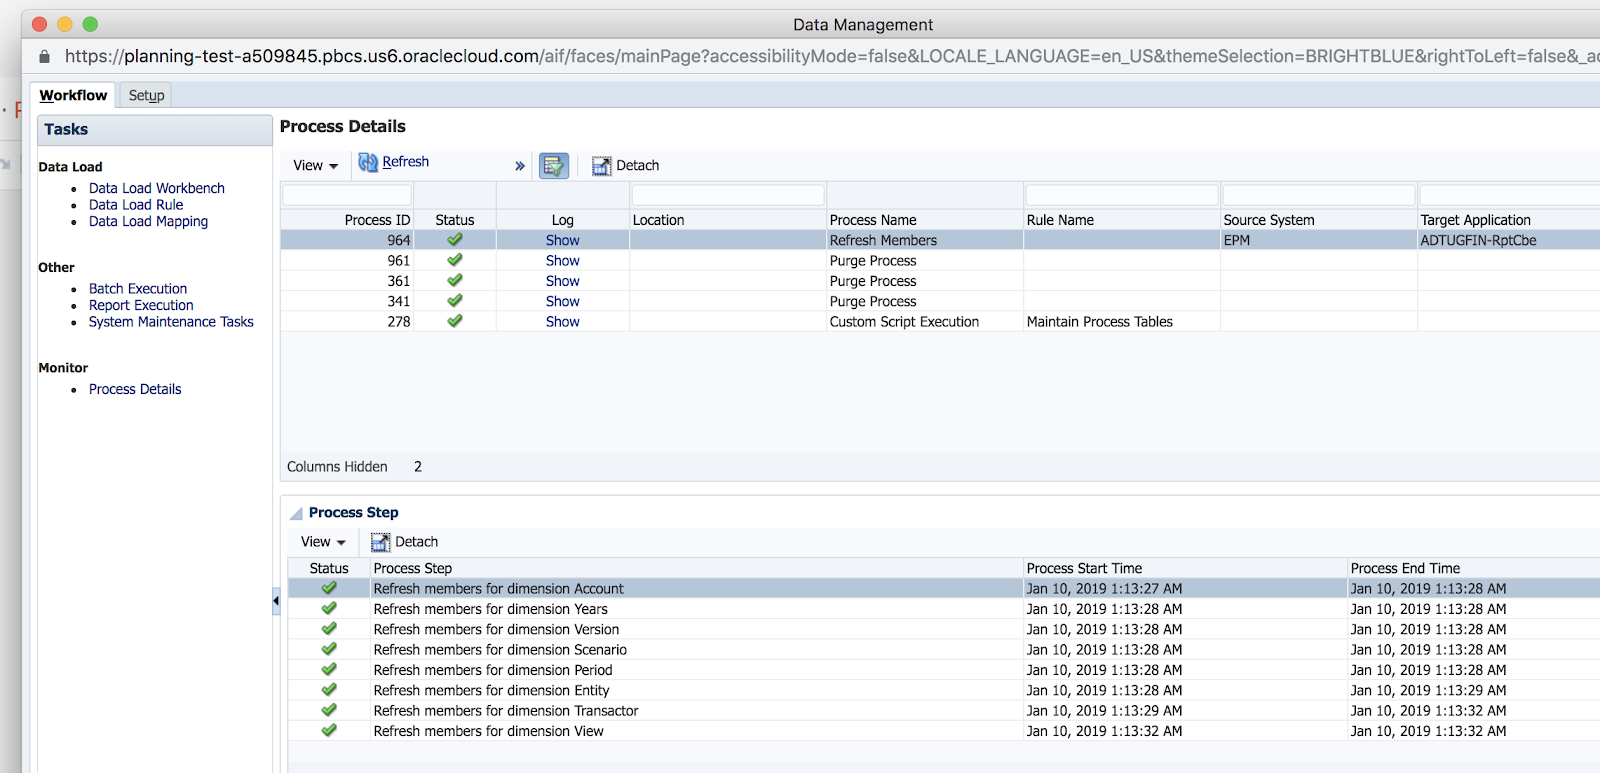
Go to Process Details and ensure the member refresh was successful
 |
| Fig. 14 |
Congratulations, you have created the target application for your ASO plan type. We will use this application as the source for our custom text application we created.
This last step of creating the ASO target application is the one that I found to have the least documentation available. Now that we have overcome that hurdle the rest of the steps are pretty well documented by Oracle, nonetheless I will list them here for completeness.
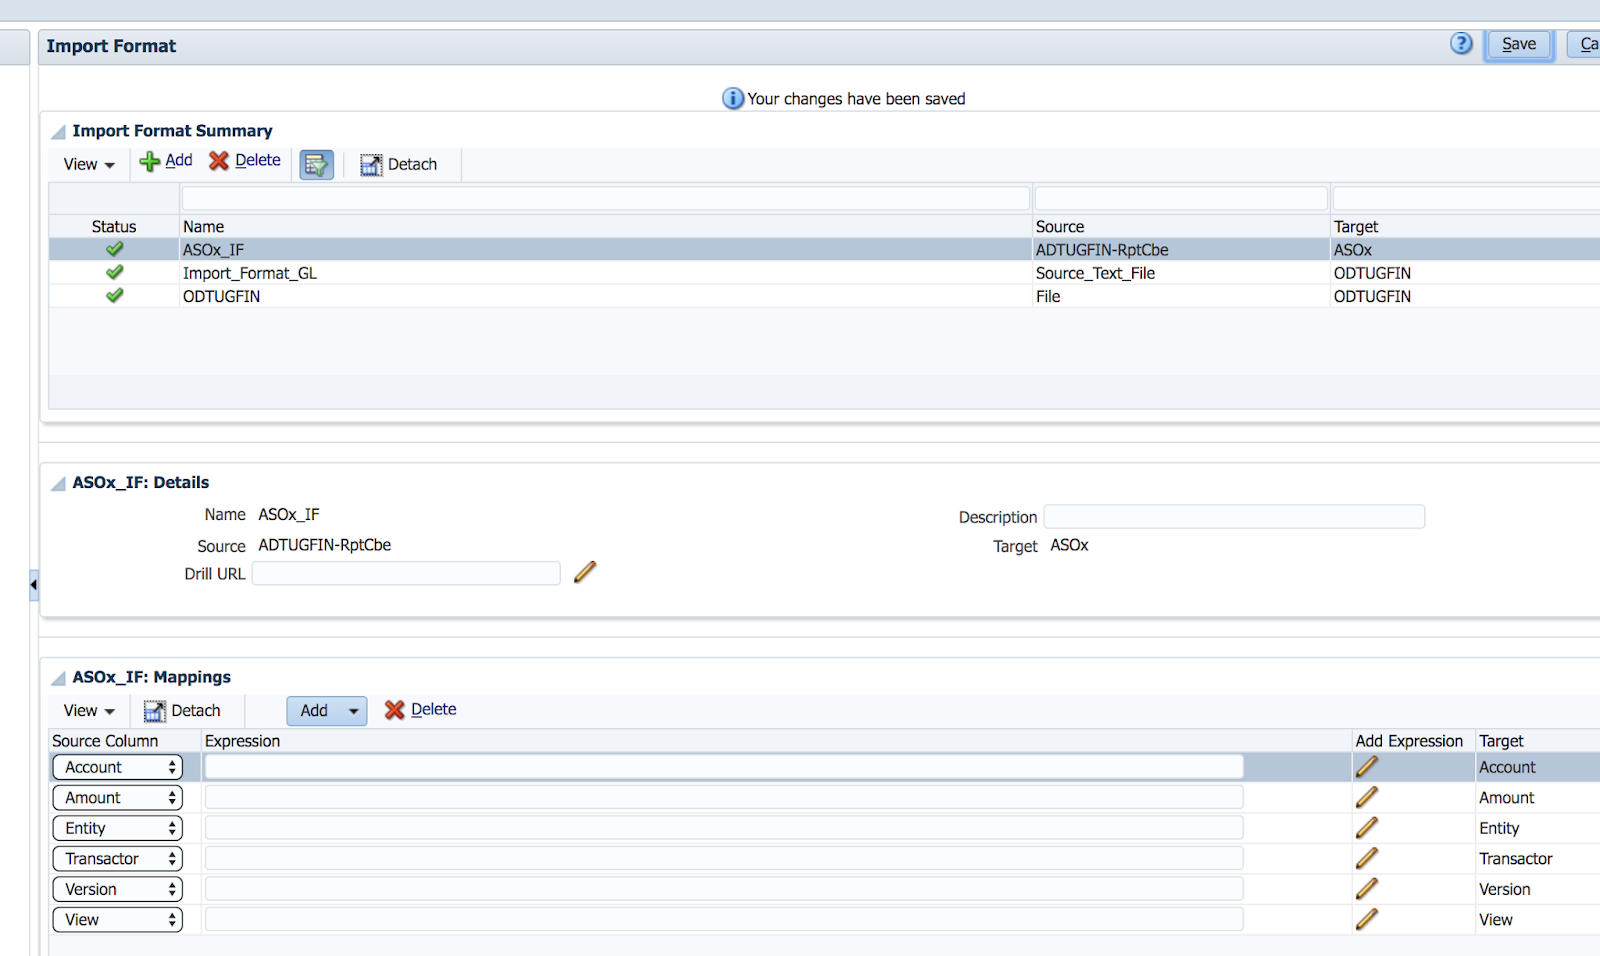
The next step is to create an import format that will allow us to map the dimensions in the ASO target application to the dimensions in the text file export.
- Return to the Set up tab and go to Import Format and click the Add button.
- Give the import format a name.
- Click the magnifying glass next to *Source and select the ASO plan type target application we created in the previous step.
- Click the magnifying glass next to *Target and select the text file export target application we created in the first step.
- Click Save
- Select the correct dimensions from the drop down list in the Source column for each row to match it to the dimensions in the Target column.
- Note that Period, Year, and Scenario are not included.
- Click Save
 |
| Fig. 15 |
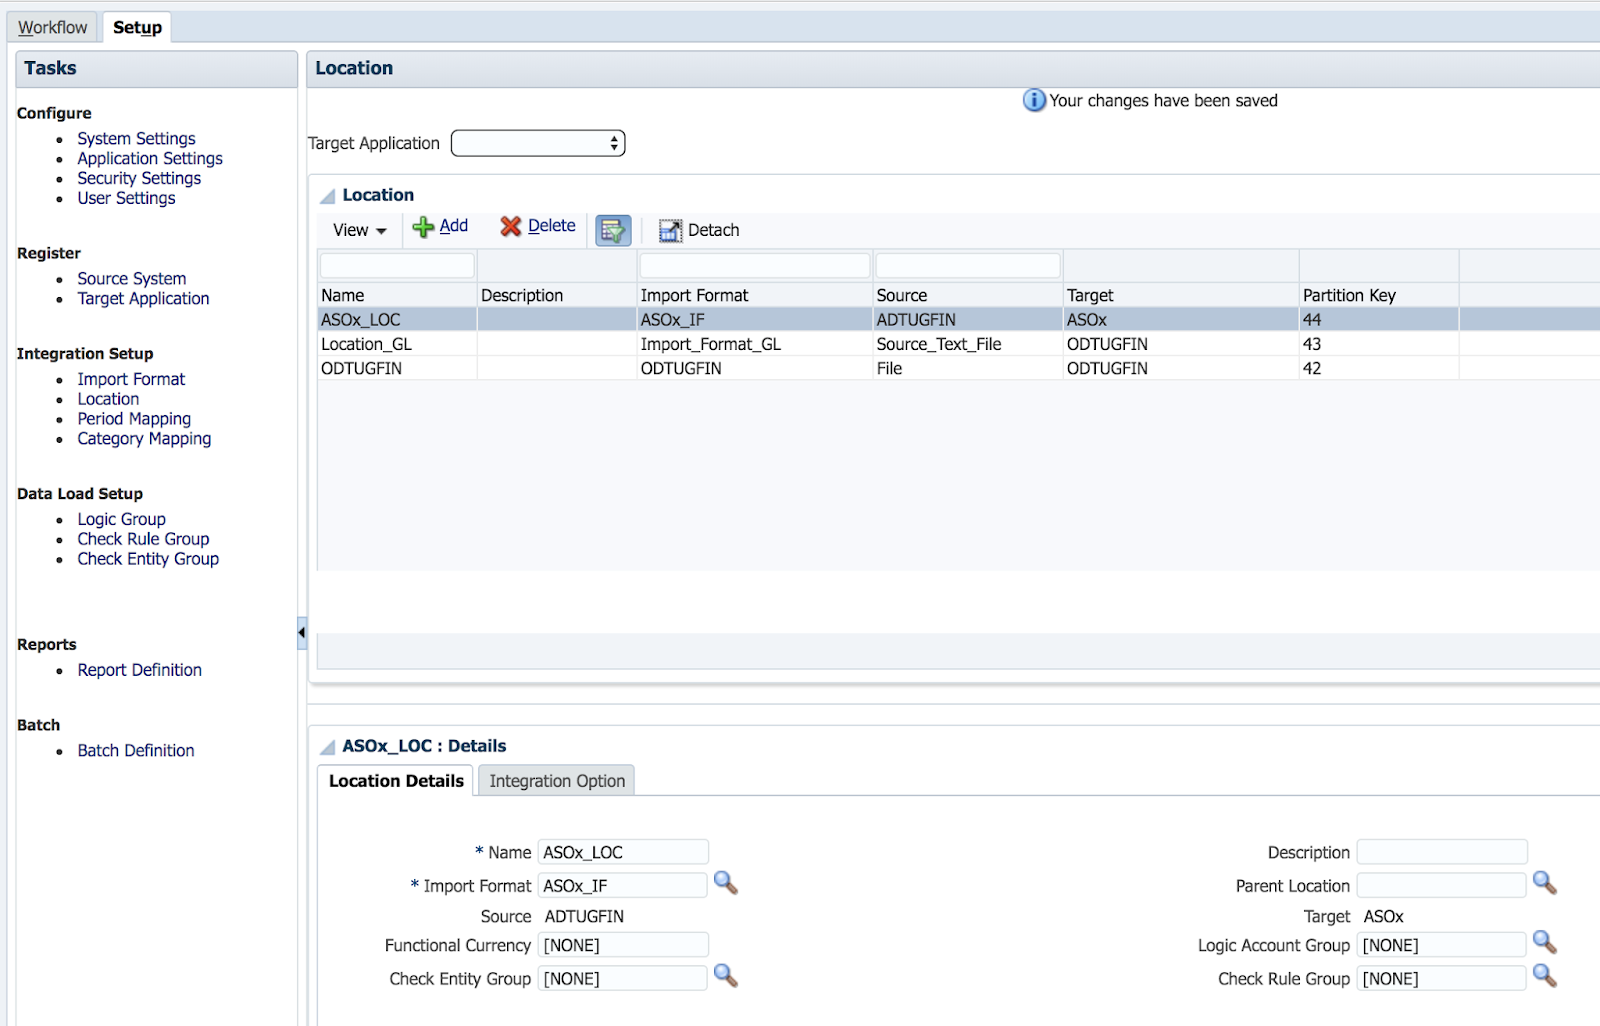
Now we need to create a Location.
- Click 'Location' below 'Integration Setup' on the Set up tab
- Click the Add button
- Give the location a name
- Click the magnifying glass next to *Import Format and select the import format we created in the previous step
- Note that the source and target are automatically populated in a way that makes sense this time (i.e. the ASO cube is shown as the source and the text output is shown as the target.)
- Click Save
 |
| Fig. 16 |
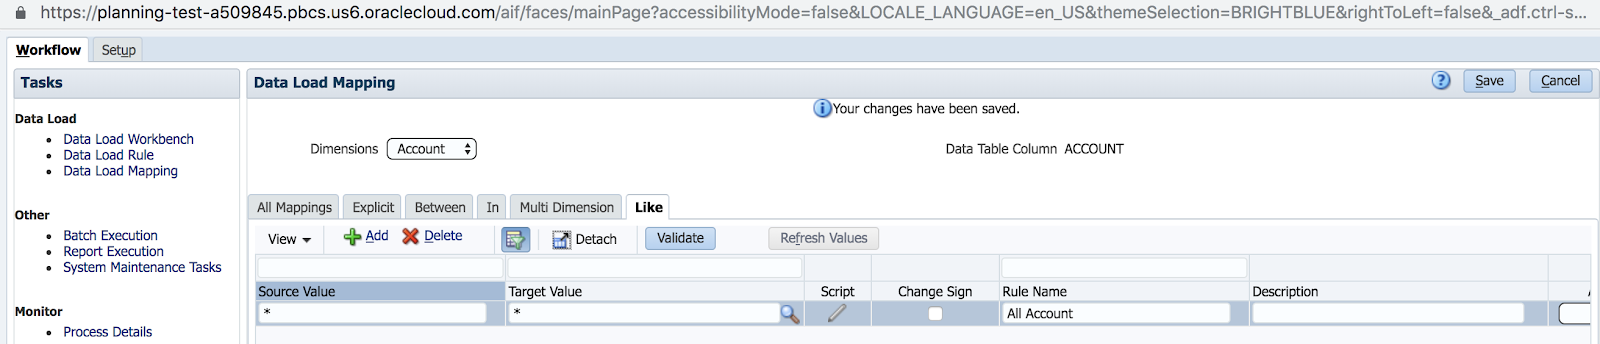
Next we have to define the Data Load Mapping
- Go to the Workflow tab and click on data load mapping
- Note that the 'Dimensions' drop down list is on 'Account'
- Select the 'Like' tab
- Click the Add button
- Enter an asterisk(*) for both Source and Target
- Enter a rule name
- Click Save
- Repeat steps 1-6 for all dimensions in the 'Dimensions' drop down, except for Data.
 |
| Fig. 17 |
We are now ready to set up a Data Load Rule to export our data
First we have to select our location
- Go to Workflow tab and click on 'Data Load Rule'
- Click on Location on the bottom of the screen
- Select a period and category that has the data you want to export and click OK
 |
| Fig. 18 |
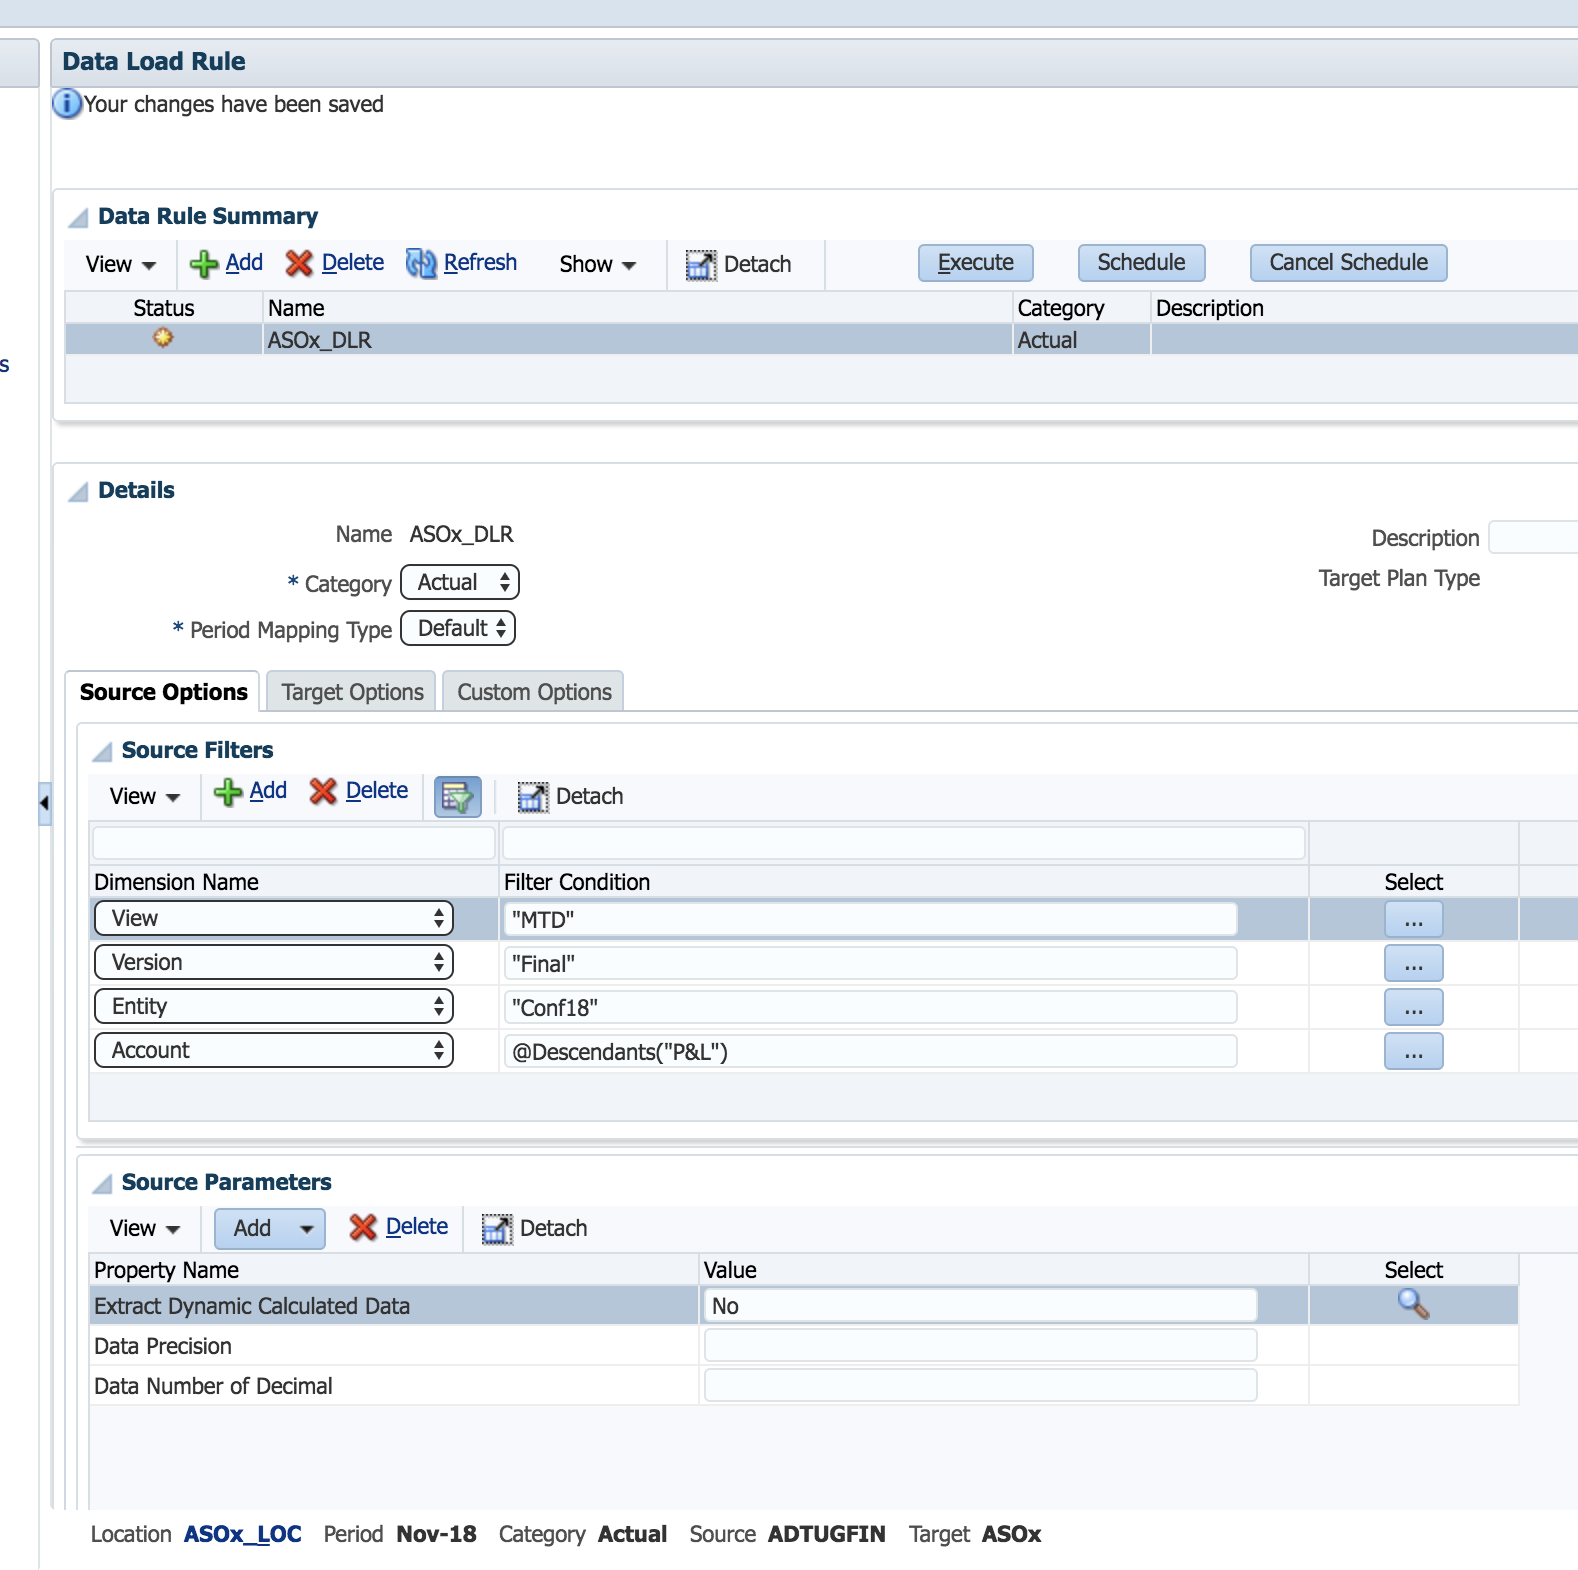
Now we can create our rule
- Click Add
- Enter a name for the Data Load Rule
- Use the source options tab to create dimensional filters that will limit the data you export
- Click Save
 |
| Fig. 19 |
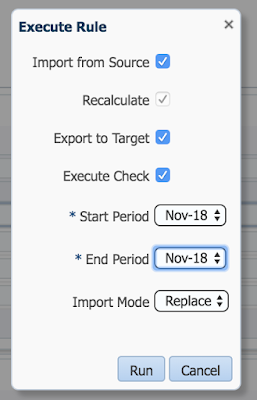
We are now ready to run the export by clicking the 'Execute' button
Select your rule execution options and then click 'Run'
 |
| Fig. 20 |
- Go to Process Details to see the status of the export
- Look for the green check mark indicating the process was successful
- If the process was not successful, view the log by clicking on the word 'Show' in the Log column to determine what went wrong
 |
| Fig. 21 |
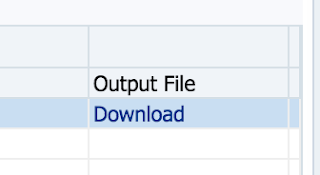
- Scroll all the way to the last column on the right and click on 'Download' to get the output file
 |
| Fig. 22 |
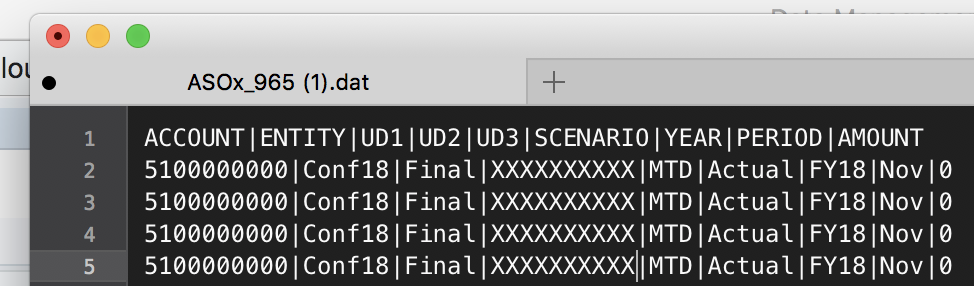
Review the output
 |
| Fig. 23 |
Once you have confirmed the rule exports the correct data, you can automate the export using the EPM Automate utility.
Post a question or a comment if you have one.
Happy Coding!


Comments
Thanks for the contribution.
Have you had success exporting text values via DM (e.g. smart list text, or the text of members set to text?
Thanks again,
Luis
As for the 5M cell limit, it is a bit frustrating since that is an Essbase cfg setting. They chose 5M as the number they feel is adequate and now don't want to change it for "system stability" reasons. We modify this setting all the time on our platform for different apps with no ill effect. I'm told the PM team is evaluating increasing the limit across the board for all PBCS apps. Perhaps that will help some use cases.
Regards,
Very nicely articulated document. However, when we tried this, we are running into the below error. Can you please advise?
Cannot perform cube view operation. Essbase Error(1260046): Unknown Member [Period].[Oct] used in query
Regards
Aravind
Are you able to export on any other periods?
Thanks for the post. I have not had a chance to test it myself, so I apologize for asking this before testing myself.
Does the file get dropped into the inbox/outbox so we could used the Listfile command to get the file name and download it via scripting?
Thanks,
Scott
We checked and updated the period mapping and it is working fine now.
Thanks.
Regards
Aravind
Thanks for the post - it saved us a lot of time and pain.
Do you have any idea how to change the column headings, from the UDn headers to something more useful? The team that is receiving our extracts is complaining about the headers and we can change them manually every time we do an extract, but we would prefer something more automated.
Thanks,
Mike McDonell
My Mapping is working fine for BSO to ASO data Transfer and BSO export.
-PB
Hi,
This error you resolve by putting the full member path. Example [Period].[Total_Year].[Q1]
Select the member using the option "Use Qualified Member Name = Yes in the select member in the filters
This is a very clear explanation but I have doubt regarding this is : Can we export YTD and QTD data as well using the data management? Where YTD and QTD are members in a period dimension. I tried mentioning the period as generic in my target application and specfying the period members along with the YTD and QTD members in DM Rule filters but its getting failed at them import as Its not able to catch the period.
Could Help on this?
Regards
Chiranjeevi
Can we export all 12 periods of data in one extract file?
Thanks